It ought to be accepted universally that thinking about what to make takes up two-thirds of the time actually worked on any project. It certainly is that way for me. After impulsively promising to show you how I make charm pillows last week, I realized that I hadn’t the foggiest notion of what to use as my exemplar this week. So I went about my business that week thinking about this, that and the other, as one does. And between my moments of busy-ness, especially as I was gardening, I thunk and I thunk and I thunk. And as it happens, I put two ideas together and came up with a plan for a sweet charm pillow for a friend. That process took most of the week, but once I had an idea in place the project just flew. It took just a few hours to choose and prep some fabric from my stash; find, download and flip the graphic that I wanted; trace the design onto a piece of paper-backed adhesive web; press said web to the back of a piece of fabric; and cut out the design. In fact, the latter part of that was completed whilst watching the Warriors win the fourth and final game of this year’s NBA championship series, which would have been impossible to accomplish during one of the earlier, more fraught games. The next day I fused the applique to its mate, and then ran out of time to work on the project for a few days. Such is life, yes?

As this is still a WIP, I haven’t a picture of the finished item for you, but I do have a few progress shots. I’ll edit this post with a pic of the completed prettiness in a few days, and will add some additional progress shots for your general edification and amusement. I do have some helpful project tips for you to consider now, however. And among the tips listed below, I must emphasize one in particular: if your project involves fusible web, do remember to take the paper backing off when you’re fusing the applique into place, won’t you? I kept forgetting, which fortunately was more annoying than destructive.
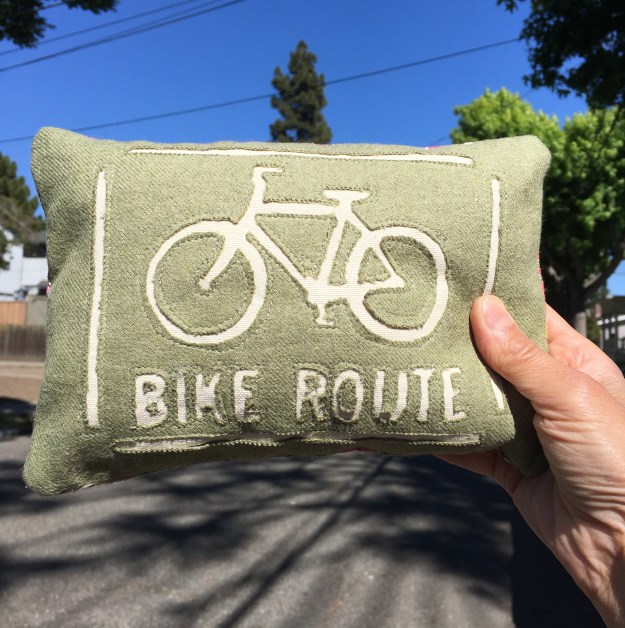
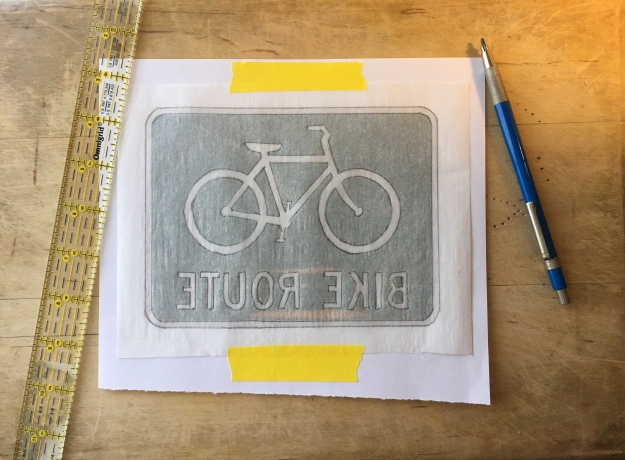
Make way for bicyclists!
But before we go to the tips, could we take one more moment to chat about the process of thinking up a project, please? Because really, so many people are deeply insecure of their ability to design something that is attractive – let alone their ability to create something that’s well-made. When this happens to me, I try very hard to recognize that feeling of inadequacy for the foolishness that it is. If that insecurity troubles you, push it away! Your first attempt might be a little rustic, but your second attempt will be a bit better, and so on until your nth effort, which will be very fine indeed.
Let’s have some tips, then!
- Are you super super busy, and can’t imagine having the time to work on a project, no matter how small and simple? Think of it as a project manager would: break the project down into its composite parts; set yourself some attainable goals; and then start, continue, and finish the project. This is how I approach projects at work, but it took me the longest time to use this approach for craft projects. Go figure.
- Paperbacked adhesive web is your friend, especially for projects that shan’t be worn and that will be infrequently washed. Just remember to trace the design on the paper backing BEFORE you fuse it to the back of your applique fabric. And make sure that your design has been flipped before you trace it, as it will be on the back of the fabric that you’ll be cutting and appliqueing.
- Read the instructions for your paperbacked adhesive web and then follow them. Do this every time you use the stuff, because you will have a brain fart moment and forget a key element. My bugbear? Remembering to remove the paper backing before attempting to fuse the applique into place. The look on my face when I have forgotten to remove it, once again, must be priceless.
- When choosing a design or image to use as an applique, the simpler the better. I didn’t follow my own advice for my most recent charm pillow, which is why it’s not ready today. On the other hand, by not following that advice I am now much better at cutting out slightly complicated designs.
- Also, do remember that you’ll be cutting out the negative space, please. I gave myself an awful turn at one point with this project when I thought that I’d cut out the wrong space, and I was very sad until I realized that I hadn’t after all.
- Once your applique has been cut out and fused to its backing fabric, I urge you to machine-stitch around the outline, especially if you have small fiddly bits that are only tacked on by the fusing web. Amateur sewists like me should use a thread that matches the applique; more talented sewists can go wild and use a contrasting colored thread, if they please. I should point out that I used a contrasting thread to hand-embroider some details on the Monument Valley charm pillow that I made for the Mister, and it came out fine. Yours will too.
- And lastly, at least for this post: remember to brag shamelessly about the project when it’s done – the praise you get will help motivate you to work on a new project. If you’re not the type to shamelessly brag, then at least find the strength to modestly state your makership of the item in question. Firstly, you might inspire others; secondly, you ought to be proud of your handiwork, really you ought.
Whew – that’s it (for now) for this post. I’ll update it as the week and the project progresses, I promise. Next week’s post is prob’ly going to be about getting ready to preserve summer’s bounty, but it might be about something else entirely. Oh, what bliss to have so many project ideas!
Ever so fondly – yr little munakins
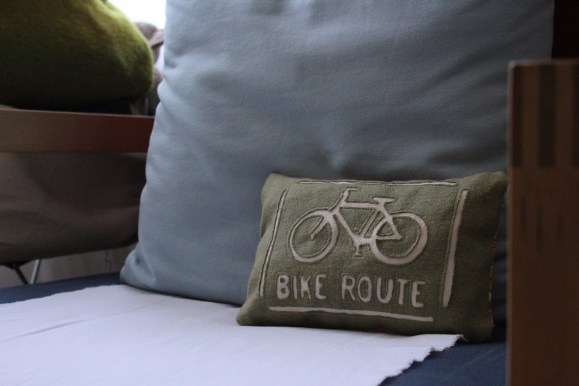
This little charmer will be going to its forever home soon!
