 Greetings from the Houseproud homestead’s kitchen, my pets! I was a busy little munakins this last week, most of it spent out in the world, but a few good stretches of time spent in our kitchen. And given how busy I’ve been and how busy I’m sure you’ve been, what better way to amuse you this week than by giving you some easy recipes to hack? What I’ll be showing you today follows my rule of “spend a little time now and you’ll be happier later”. I’m a great fan of applying this principle to cooking, as it keeps me well-fed and happy no matter what my schedule is like. First, a few notes about this week’s post: (a) there will be a complete lack of process photos; and (b) except for rough instructions on brining, there will be no measurements in pounds or cups or what-have-you. Secondly, as these pictures show, I use a variety of jars to house my pickles and ferments. The only rule I have for jars used for preserving is that they are made from either glass or pottery, and that their openings must be wide enough to easily get raw food in and pickled / fermented food out. Also, it’s a good idea to use a bit of waxed paper to form a barrier between a metal jar lid and its acidic contents. You don’t need to use a barrier, but your metal lids will last ever so much longer if you do. And lastly, as an aside, each of the following recipes are easily made in a few spare minutes by anyone, even those working full-time outside or inside the home.
 Let’s start off with something very simple: sliced onion ‘fridge pickles. These are VERY simple to make, can be used within a few minutes of making, and are wonderfully versatile. You can use any type of bulb onion for this recipe: red, sweet white, yellow, or immature spring bulbs. I’m fond of using red onions, mostly cuz they turn the vinegar solution a lovely pink. Pickling mellows the onions – the more time they spend in the solution, the mellower they become. Pickled onions can be added to raw or cooked salads, and the vinegar solution can be incorporated into dressings. The pickled slices can also be fried in a little fat – this is especially nice if they’re tossed into a pan already being used to cook something rich, like tofu slabs or pork chops. The pickles last for weeks in the fridge, and once they’ve been used up you can restart the process by adding another onion to the jar, topping off the vinegar, and adding another pinch of salt. So how do you make them? Here’s the full list of ingredients for my onion pickles: one sliced onion, white distilled vinegar to cover, and a pinch of sea salt. There, wasn’t that simple? I use a mandoline to slice my onions, usually setting the blade at 3mm, but I’ve used a knife when making these far from the homestead. Of course, there are endless variations on these simple ingredients, but I urge you to keep it simple for your rotating batch. If you want to make a special batch to give as a gift, or if you frequently use certain spices in your meals, this recipe can easily flex to meet your tastes. I’m very fond of pickling onions with lime juice and oregano, which makes ’em particularly tasty with Mexican food. I should point out that pickles made with citrus juice instead of vinegar should be used within a few days, before they loose their umph.
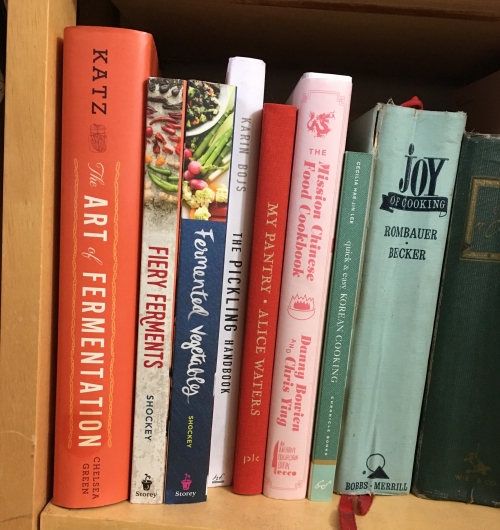
 Next up: fermented garlic cloves, which certainly do not lack umph. These are almost as easy to make as ‘fridge onion pickles, especially once you have a batch going. IMPORTANT NOTE: fermenting does not mellow garlic; the fermented cloves will be just as potent as raw garlic. The brine is pungent, but not as much as the cloves themselves, which makes it a very nice addition to dressings or cooked dishes. Think of it this way: use the brine for dishes where you want just a hint of garlic. The cloves are incredibly convenient to have on hand- they’re peeled and ready to use at any moment, and you never have to worry about having to cook with old, dried up garlic ever again. Starting your first batch of fermented garlic will require a small amount of measuring, but you really do have it in you. I haven’t made the brine from scratch for at least a few years, so I had to crack open my copy of “The Art of Fermentation” by Sandor Ellix Katz to give you the skinny. Katz is so very good at explaining things, my pets – you really ought to read him if you have any interest in fermentation. Anyway, if you don’t have your trusty copy of “The Art of Fermentation” to review, in the brining section Katz explains that you’ll want to start with a 5% solution. For a quart of water, you’d want to add 1.6 oz of sea salt. Depending on where you live, you might need to use distilled water. We have good water at the homestead, but I get better results if I let our water breathe for a few hours before I use it to brine (this allows some of the treatment chemicals to dissipate). Don’t have a scale to measure the salt? Katz reports that 1.6 oz of salt comes to roughly 3 TBL of salt. Coarse salt has more volume per ounce, so use more of it; finer salt has less volume, so use less. [Have more questions? Buy Mr. Katz’s book – you won’t regret it.] Once the brine’s been made, here are the ingredients that go into my fermented garlic cloves: garlic cloves and brine. See what I mean about easy? To make up a jar, peel a head of garlic into naked cloves, trimming the tough attachment bases as you go along. Cut larger cloves into half, from base to tip. Smaller cloves can go into the brine uncut. Young garlic cloves don’t need the inner sprout removed, but older garlic might. For best results, don’t use garlic that has bright green sprouts and shriveled cloves. Place the peeled cloves in a jar with the brine, cover loosely with a lid, and keep the jar on the counter for at least a week, away from direct sunlight. Check the jar every day to make sure that the cloves are well covered by the brine, and that the brine is actively bubbling. Unlike other ferments with higher sugar contents, the garlic brine will not be very active, but you should see small bubbles around the cloves or on the side of the jar. After about a week, the cloves should be slightly yellowed and the brine should smell very pungent. Hot and humid weather makes for faster fermentation; colder weather slows the process down. Once the ferment smells right – and you’ll know when it does, trust me – tighten the jar’s lid and pop the ferment into the fridge, where it will keep indefinitely. Need to top up your existing jar of fermented garlic? Just add more peeled garlic, stir about a teaspoon of salt into the existing brine, and keep the jar on the counter for at least three days – checking it every once and a while to make sure that it’s bubbling away. There’s no need to wait until you’ve used up all of the fermented garlic before adding new cloves, by the way. Once the jar has gone through its fermentation process again, all of the garlic contained therein – new cloves and old – will be perfectly fine to eat. If you care, you can fish out the older cloves to use first (they will be easy to identify, being a darker gold than the freshly fermented cloves). Really, while fermented garlic doesn’t have the instant gratification of pickled onions, there’s very little hands-on time required for this recipe. It’s much more wait-and-see time …

And on the subject of wait-and-see, have you tried making flavored salts with fresh herbs yet? I’ve got two batches of fresh mint leaves in sea salt that I’m experimenting with now: one batch has tiny, uncut fresh mint leaves and the other has shredded fresh mint leaves (pictured here). Salt is a great preservative, you know, and I am reasonably sure that one of the two versions will work out nicely – I have had great luck with whole fresh sage leaves that I tossed in salt months ago, and am now using on everything from roasted potatoes to air-popped corn.

Still life with pickles: mixed pickles and pickled beets.
Speaking of experiments, this pic shows a large jar of mixed ‘fridge pickles that I made a few weeks ago, which are only now starting to mellow out. I made the mixed pickle by separately blanching some veggies that I knew would taste good together: cauliflower, green beans, carrots, a fennel bulb, and green onions & garlic. I carefully arranged the blanched veggies in a large jar, added a lot of sea salt and a few spices – mustard and coriander seeds, black pepper and juniper berries; topped the whole thing with white distilled vinegar; and put the jar in the fridge. If you’re interested in making your own batch of mixed pickles, learn from my mistakes: mix the salt and spices with some of the vinegar before adding them to the jar, which will help distribute the flavors. I quickly realized the error of my ways and shook the jar to disburse the spices, but still and all… Also, don’t bother making the jar look pretty. After a week of the pickles curing unevenly in the fridge, I dumped the whole jar into a large bowl; halved the pretty-but-oversized green beans, carrot sticks, cauliflower stems, and fennel slices; mixed everything together well; and returned the pickles the jar. And lastly, if you too have issues calculating the volume of liquids, add the vinegar to your mixed pickles as a two-part process: stuff the jar full of veggies, add vinegar to cover, carefully pour out and measure the vinegar, and THEN add your spices and salt to the vinegar, stirring well to dissolve the salt. Keep in mind that you’re not going for a 5% solution this time, though – that would be very salty. You want a 2% solution, or in the words of the immortal Mr. Katz, about as salty as a potato chip. Pour the vinegar back into the jar over the veggies; put the jar into the fridge; and start sampling in a week or two. Smaller batches mellow more quickly than larger batches – a jar as large as I made will take at least two weeks of curing before things get tasty.
Oh, gracious – look at the time! I’ve run out of time to tell you about the meals I’ve made using these yummy provisions, but that can wait for another post, nu? I really must scurry, my dears, so that’s it for this week. Tune in next time for more recipes from the Houseproud kitchen, or a rambling account of rambles in Redwood Park, or a humble-brag about getting through my mending pile (very unlikely, that), or a pep talk about the pleasures of gardening, or … … …
Until then and very fondly, yr little munakins

Making creamy and delicious refried beans is easy, but it sure ain’t quick.
