

Cell phone camera shot of the tables at the El Semental food truck in Tucson, AZ. It was rather cold in AZ when the sun went down. On this particular evening it dropped from the mid 70s to the low 60s in about 45 minutes. At night it would drop down into the low 40s in Tucson, and the low 30s at the Grand Canyon. That’s cold for my thin CA blood!
The winter quilt is on our bed. We’ve started closing the windows a bit at night. I’ve worn boots for the last five days straight. The weather forecast promises rain showers today. My summer tan has faded away, including the little bit of color I gained when we were in Arizona. And … and I’ve been craving soup. It wasn’t quite cold enough in Arizona to sample soups there, but as soon as we returned to the Bay Area I felt it: it’s time for soup, glorious soup! There are few things as warming and nurturing as hot soup, especially if that soup includes a spicy kick of hot peppers. Yes, yes – soup would be lovely, but you say that you haven’t the time to make soup. It takes ever so long to make decent soup, you say. But I say until you: fiddlesticks. Homemade soup’s easy, and I’m gonna prove it to you with three fabulous soups: black bean soup; chicken broth and hot peppers; and a link to Deborah Madison’s winter squash soup (via one of my fav mags, Sunset).
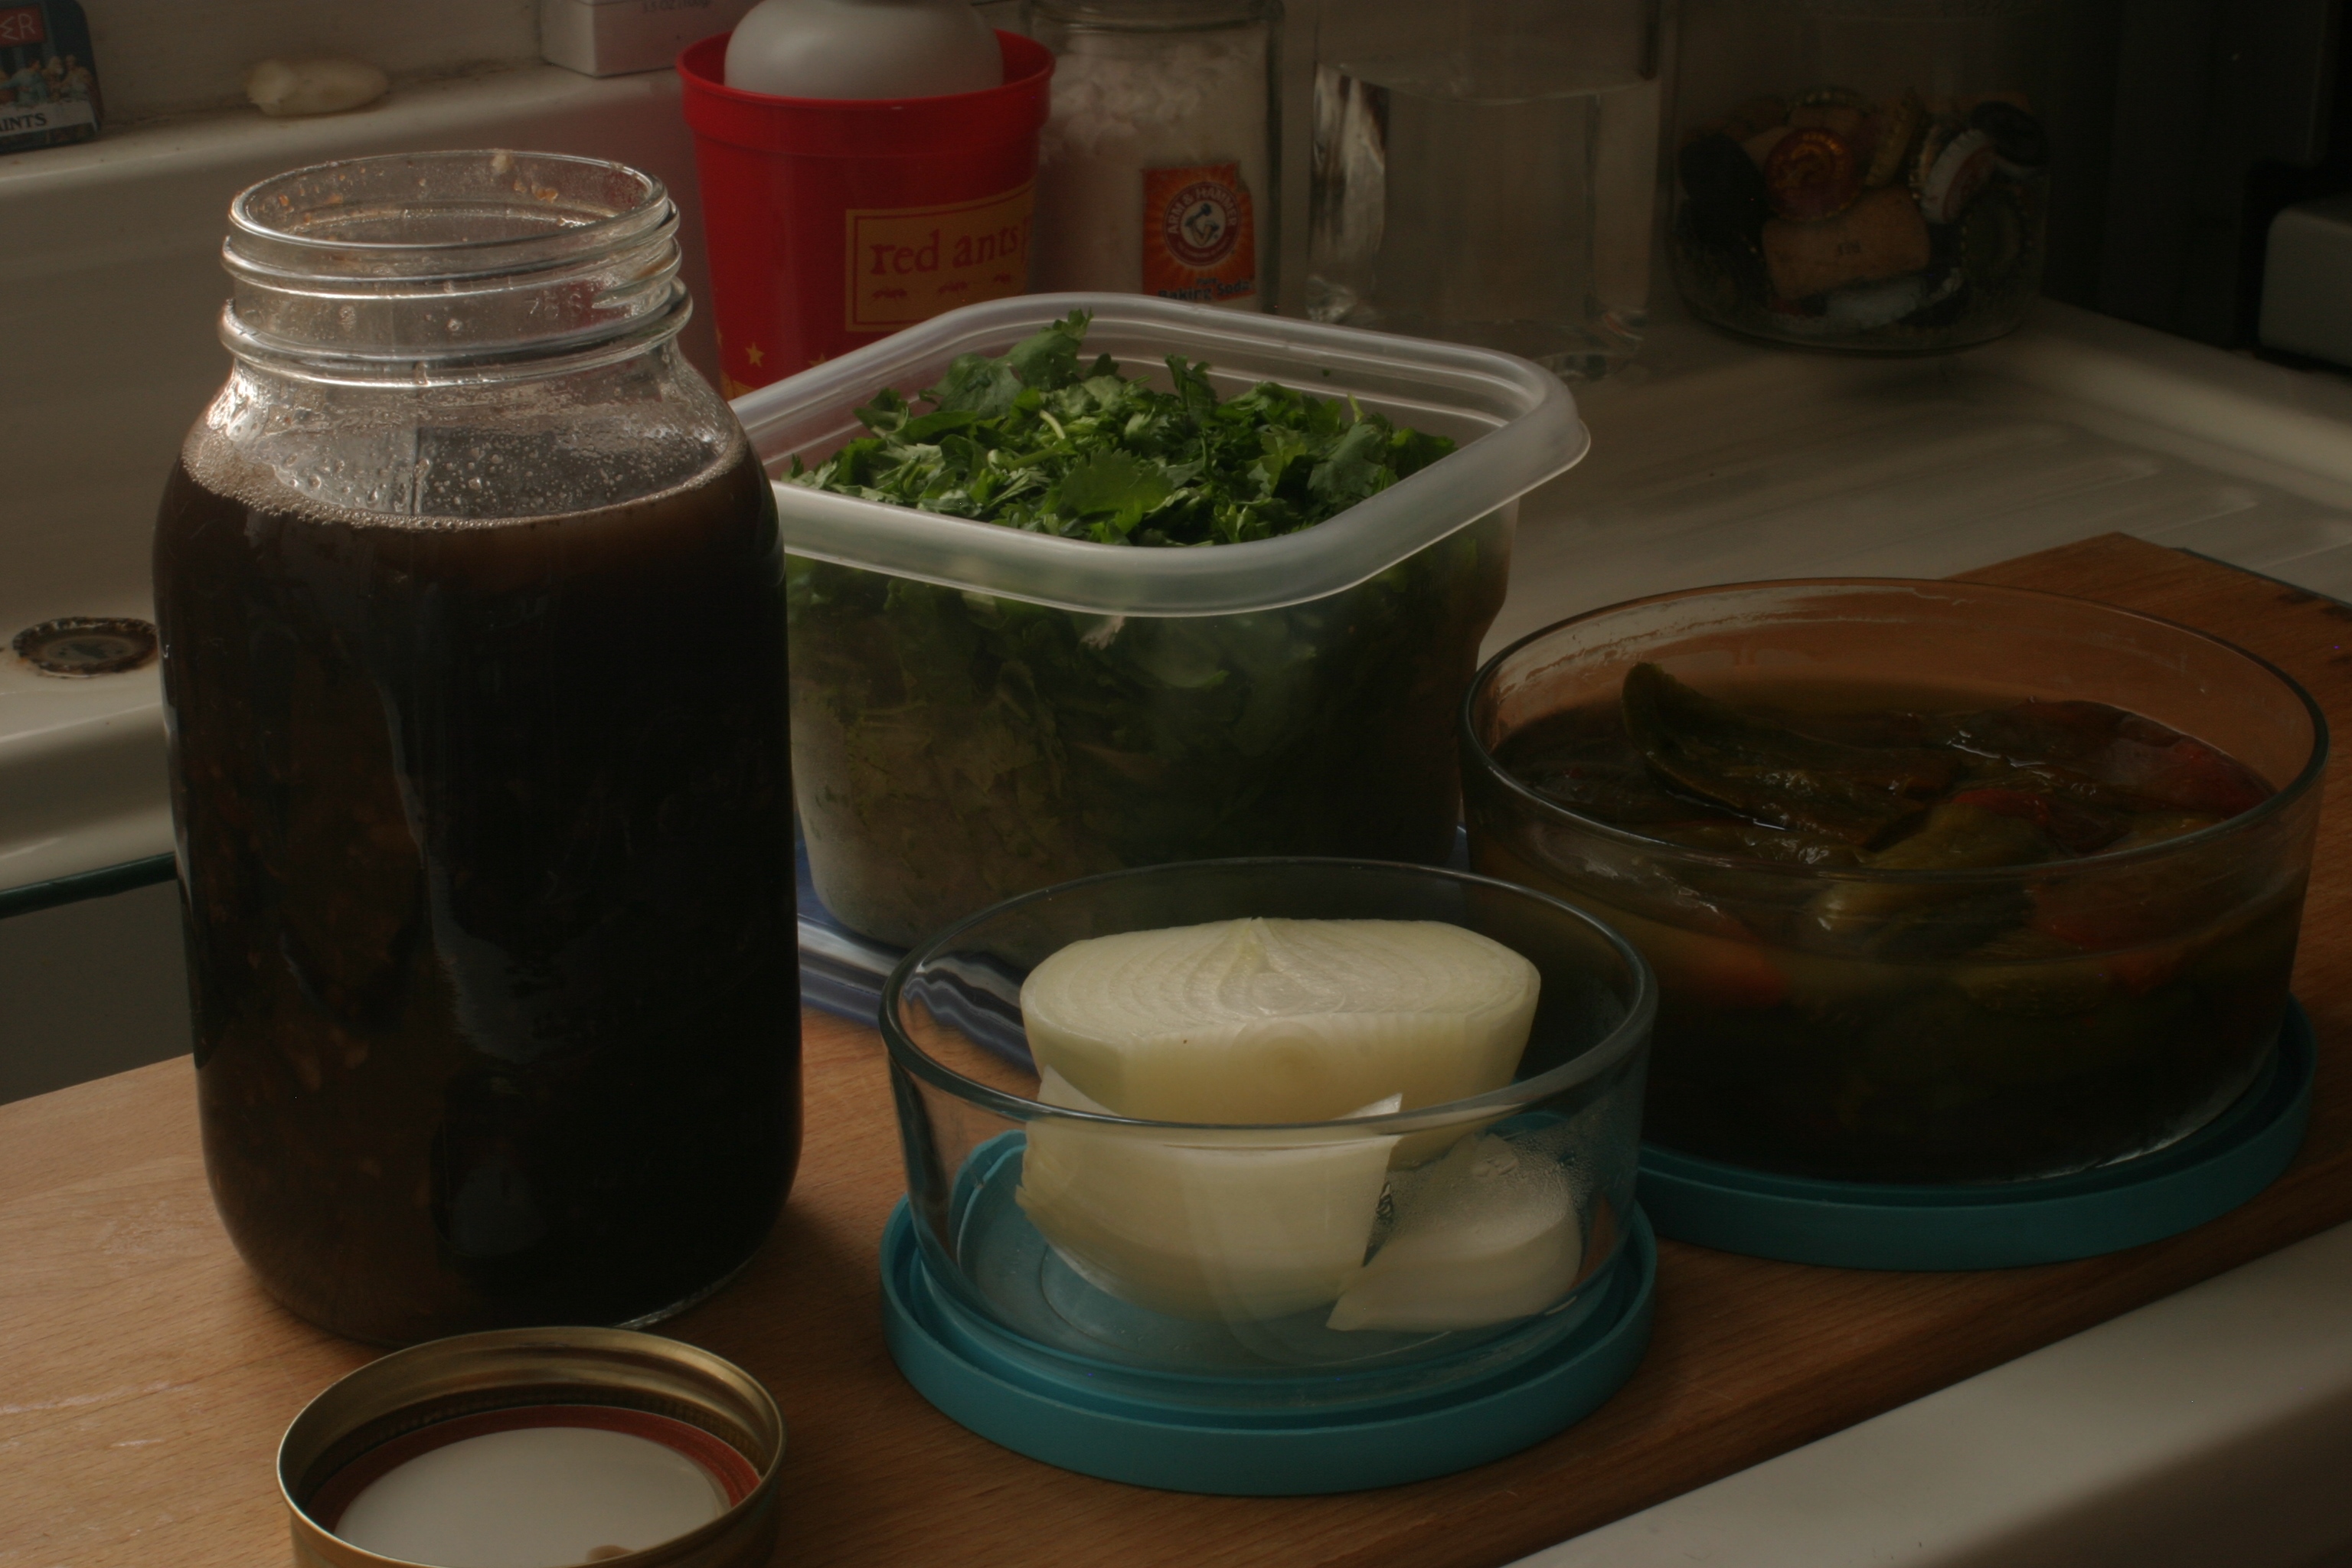
Oh happy tummy! A jar of black beans and their “broth”, along with assorted toppings. For soup during the week I will heat up about two cups of the beans and their liquid, add shredded cabbage, chopped herbs, and minced onion, some salt and some hot sauce, and I will have close-to-instant black bean soup. If I know that my week is going to be very busy, I will prep the garnishes beforehand, giving me no excuses for not eating healthily when life goes haywire.
Let’s start with the easiest of these soups, black bean soup. Here’s your list of ingredients: 1 cup black beans and 5 cups water. That’s pretty much it, people. The trick is to use very fresh dried beans – they have so much more flavor and cook up much faster. Another tip: cooked dried beans generally taste better the next day. Making soup from dried beans is very easy: just cook the beans (which make their own broth as they cook) and add garnishes to the cooked beans. There’s no need to add meat or meat stock, although you can for a very rich and filling soup. I find that one cup of dried beans cooked in five cups of water will make enough for four bowls of soup. Make the beans on Sunday and you’ll have a healthy soup to eat during the week. (For those of you who don’t cook dried beans often, a little refresher course follows this paragraph.) But what makes such a simple list of ingredients worthy of being called soup? Why, it’s the garnishes, of course! All you need for a warm and satisfying soup is to add a little bit of fat (a spoonful of olive oil or a sprinkling of cheese), some chopped herbs (fresh or dried oregano is lovely in this) and thinly sliced veggies (shredded cabbage or shaved radishes), some minced onions, and some salt and hot peppers or hot sauce. There: you have soup.
For those of you who don’t cook dried beans often, here’s that refresher course. Rinse and check the beans for debris. Soak the cup of beans in the five cups of water. Do not drain liquid after soaking. (Discard the soaking liquid for red beans. Keep the soaking liquid for all other beans. Simple, yes?) Put the beans and their soaking liquid into a large pot, bring the uncovered pot to a boil, and let it boil for a few minutes. Bring the heat down to a simmer, partially cover the pot with a lid, and let the beans simmer for 45 minutes to an hour (depending on the age of the beans – keep in mind that fresh-from-the-farmer beans can finish cooking in as fast as 30 minutes). Check for yummy-doneness by removing one or two beans from the pot with a metal spoon and blowing on ’em. The beans are done if their skins split when you blow. When they are done, take the beans off the heat and start thinking about soup! PS: You’ll notice that I didn’t tell you to salt to the beans as you cooked them – adding salt to dried beans as they cook makes the skins hard and indigestible.
But you say to yourself, I don’t want plain bean soup. Perhaps you have gotten a cold or are feeling rather like the world has painted a target on your back, and you need something more substantial. You want something rich and meaty. Done, and almost as simple: you need chicken broth with chiles.
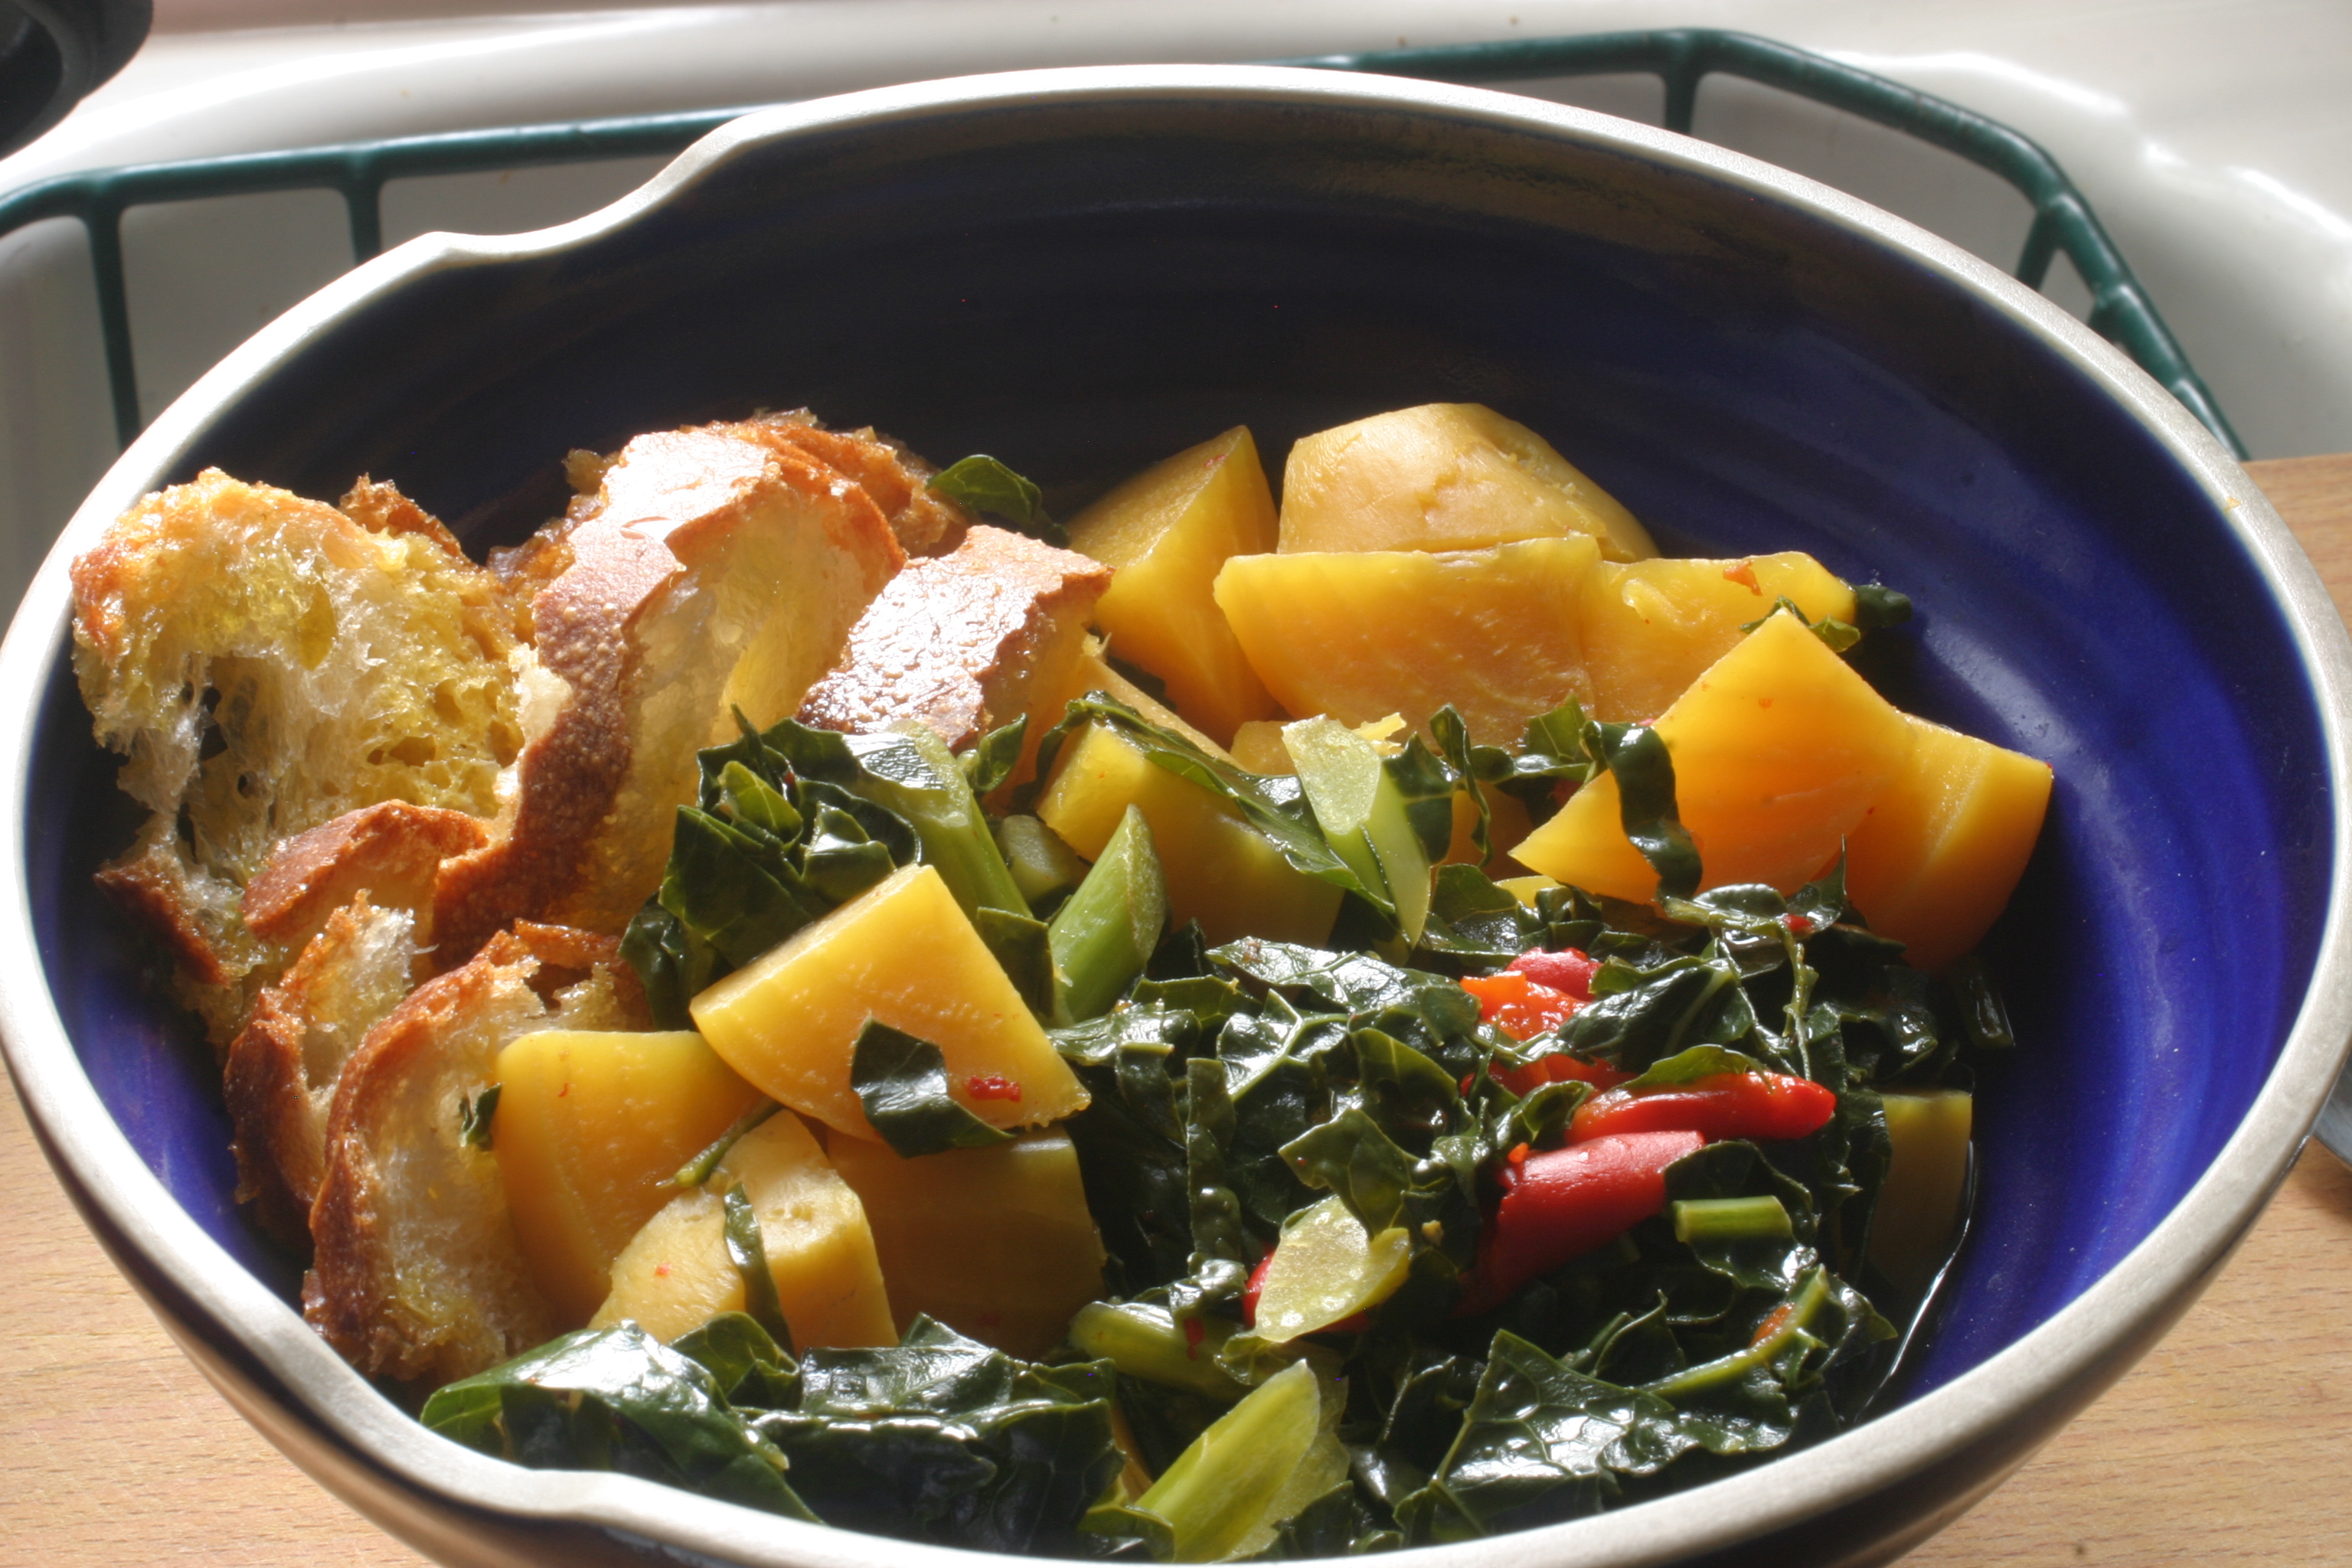
Beets roasted in chicken broth, with chopped kale and roasted red jalapenos. Add some rather stale bread (which has been drizzled with olive oil), and you have a warming soup to nosh on. I am feeling a bit frazzled and in need of a pick-me-up, so I upped the heat by adding some yummy hot sauce I bought at the Ferry Building Farmers Market in SF (hello, Edna Louise and Michael Michael Michael).
Chicken stock is your friend (unless you are vegetarian, in which case not so much). Chicken stock is laughably easy to make, its ingredients are readily available and inexpensive, and the resulting stock can be frozen for months. I make chicken stock on a semi-regular basis: more frequently when the weather turns cold and infrequently as the weather warms up. After many years of making stock (first as a vegetarian and now as an omnivore), I only recently learned the wisdom of freezing the stock in small containers and in containers that have wide mouths. Wide mouthed containers will release their contents without the need of defrosting – a boon for cooks in a hurry. And freezing small amounts means that whatever stock that’s left over won’t go bad in the fridge before you have a chance to use the rest of it up. (For those of you who don’t make chicken stock frequently, or who are mildly interested in the way in which I make stock, a stock-making tutorial follows this section.) And what can you do with stock? You can make soup, of course! My favorite chicken stock soup, which I fixed the day after we returned from Arizona, is simply hot stock (unceremoniously dumped in a frozen lump directly into a pot), to which I added salt and a LOT of hot pepper. I drank the broth out of a large tin cup (like those cups you use when you go camping), and the soup warmed both my innards and my outers.

Roast beets in chicken stock, and the earthenware pot in which I baked ’em. Have you a pot like this? Earthenware pots are a marvelous way to slowly roast root vegetables. I’ve never used one to roast chicken, but I understand that meat roasted in such a pot is very moist and tender – think tandoori chicken.
The soup I made today was made by heating up two cups of roasted golden beets and the chicken stock in which I had roasted ’em. I added about a cup or so of shredded kale and a roasted red jalapeno, some salt and some hot sauce, and ate like a queen as I typed this post. And there’s another thing you can do with stock: you can roast root vegetables in it. The roasted veggies can be served warm in their broth or as a stand-alone side dish or salad (room temperature or warmed).
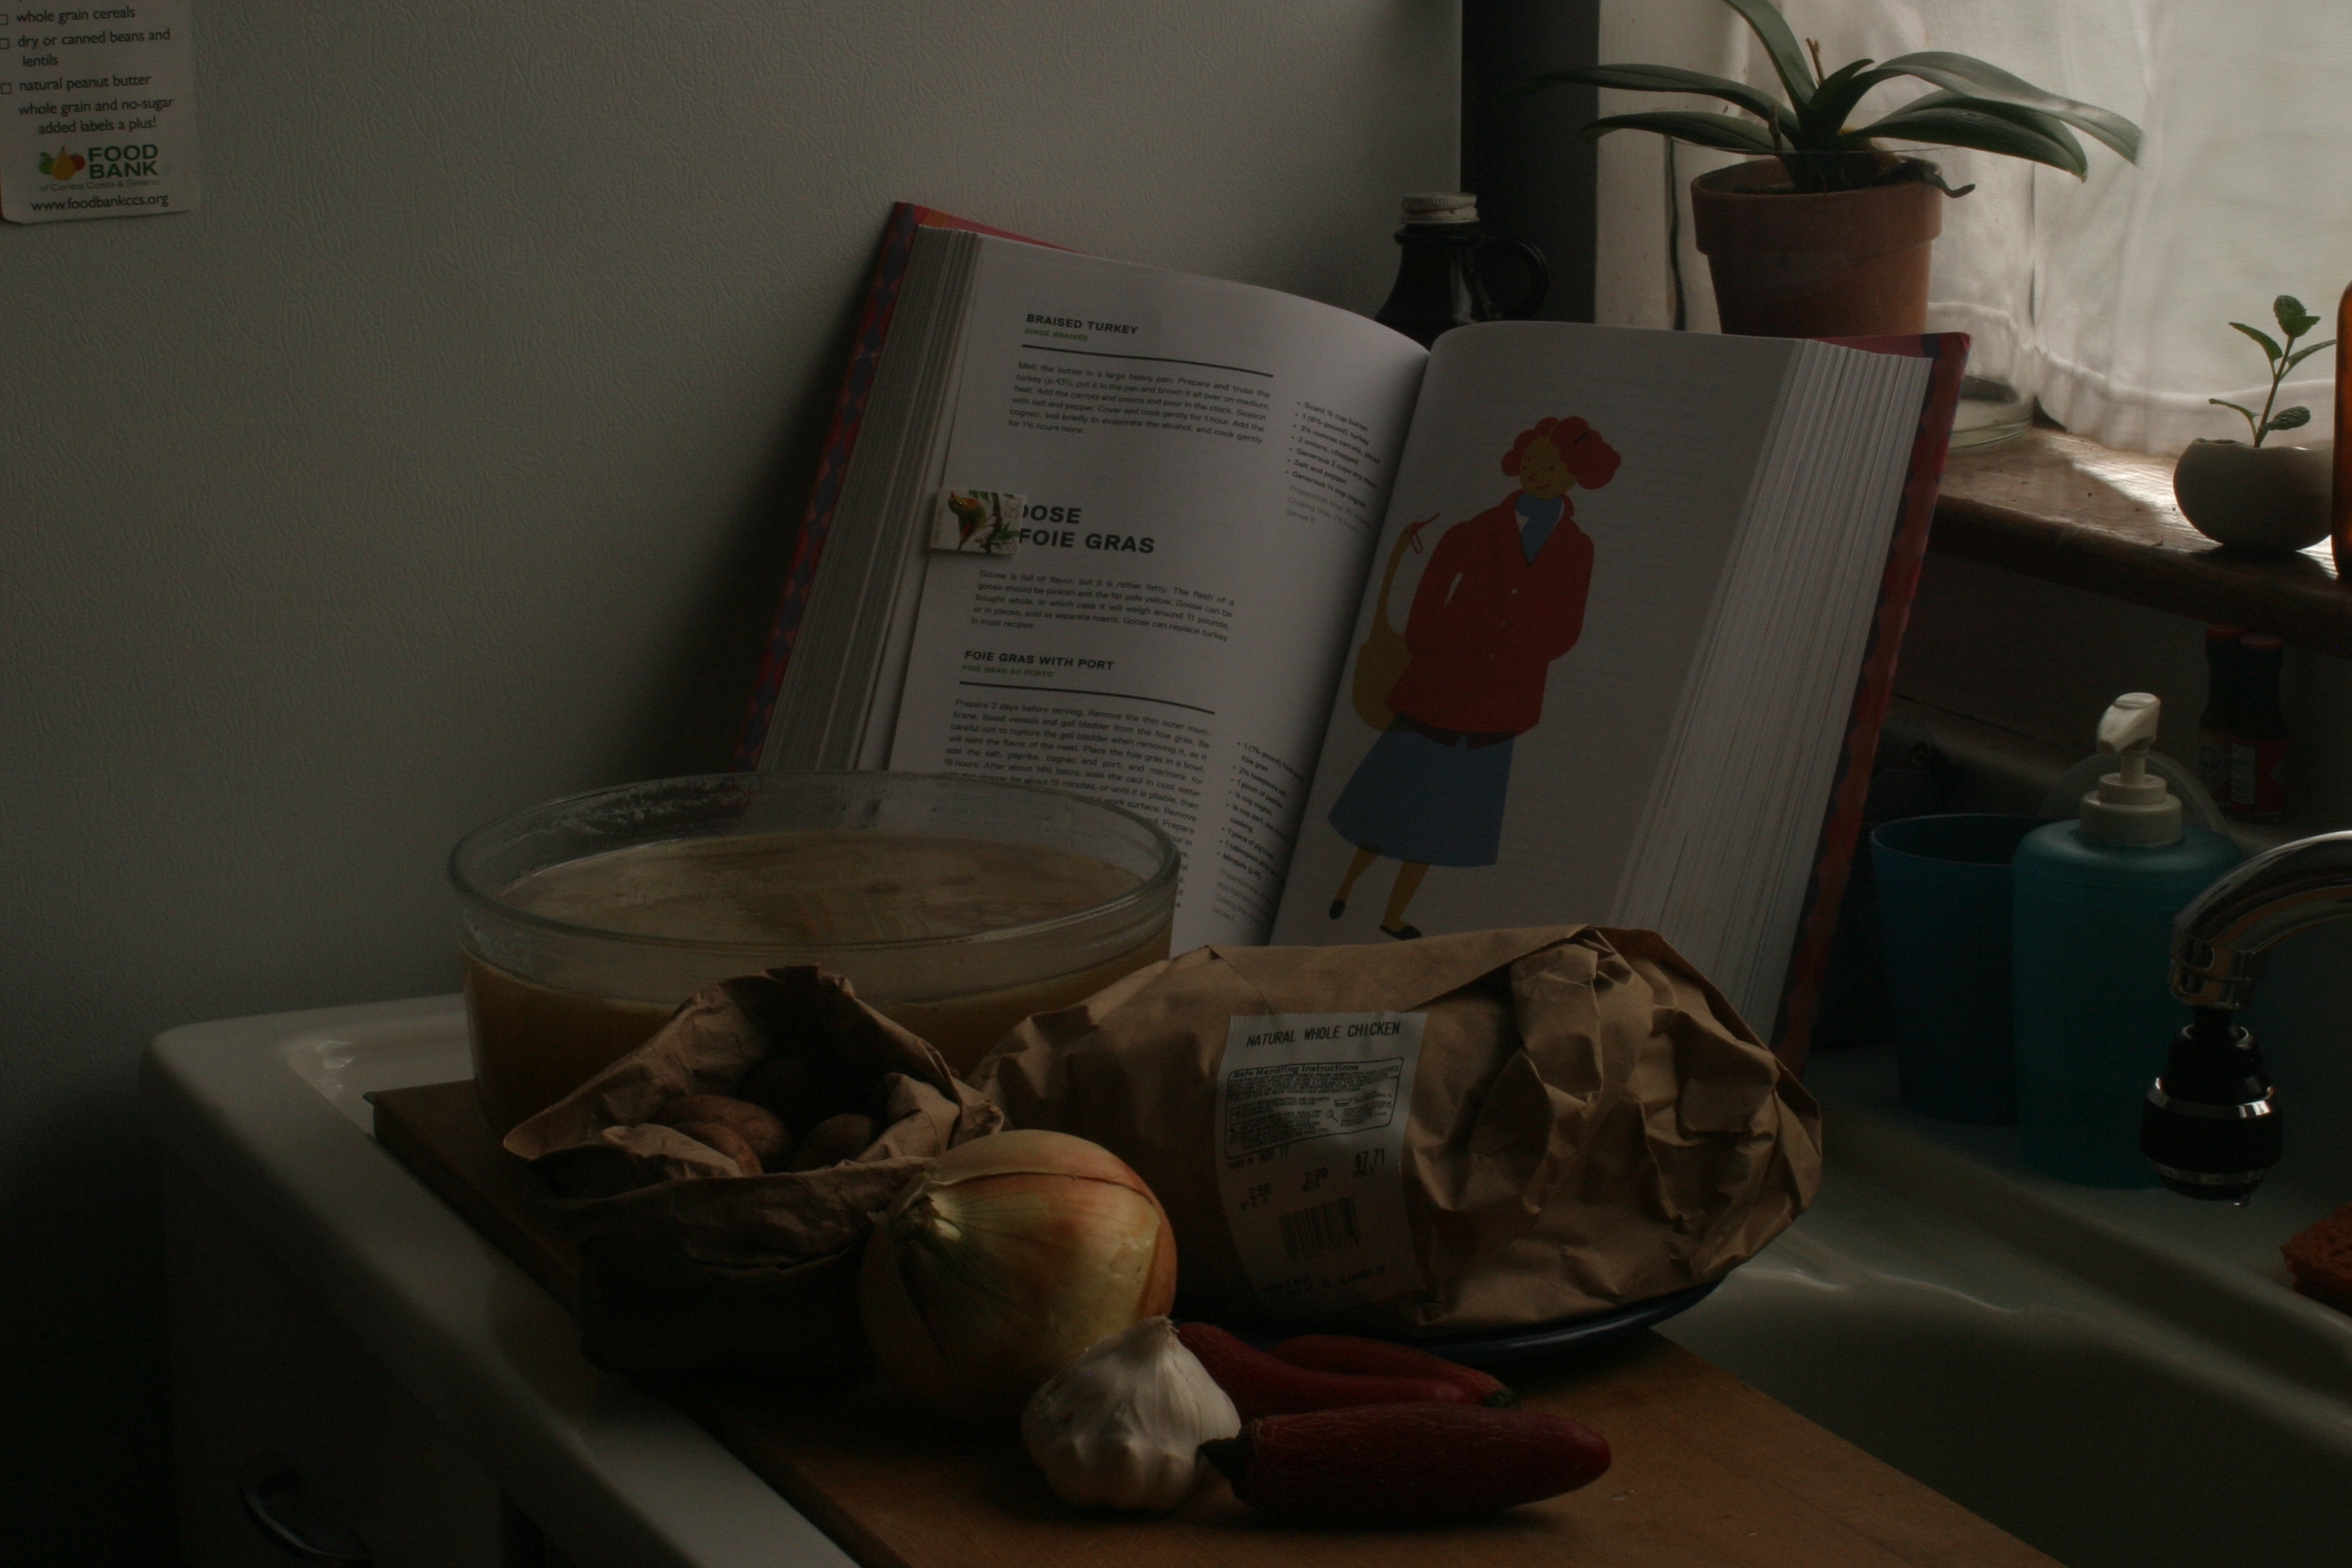
Ingredients assembled for braised chicken, along with my cookbook guide – the French cook book called “I Can Cook”, by Ginette Mathiot. I am planning to braise our turkey next week, so this was my rehearsal for Thanksgiving. I kept it simple – chicken, chicken stock, brown button mushrooms, onion, garlic, red jalapenos, and some red wine.
But wait – the uses of chicken stock are almost endless! You can braise chicken in chicken stock for a meal that is so damn good it might make you cry. I am planning to serve braised turkey for Thanksgiving next week and while I’ve served turkey cacciatore and turkey mole on previous Thanksgivings (both recipes are at their hearts braised dishes), I wanted to make sure that the flavors I had in mind would work out well. And boy howdy, did they!
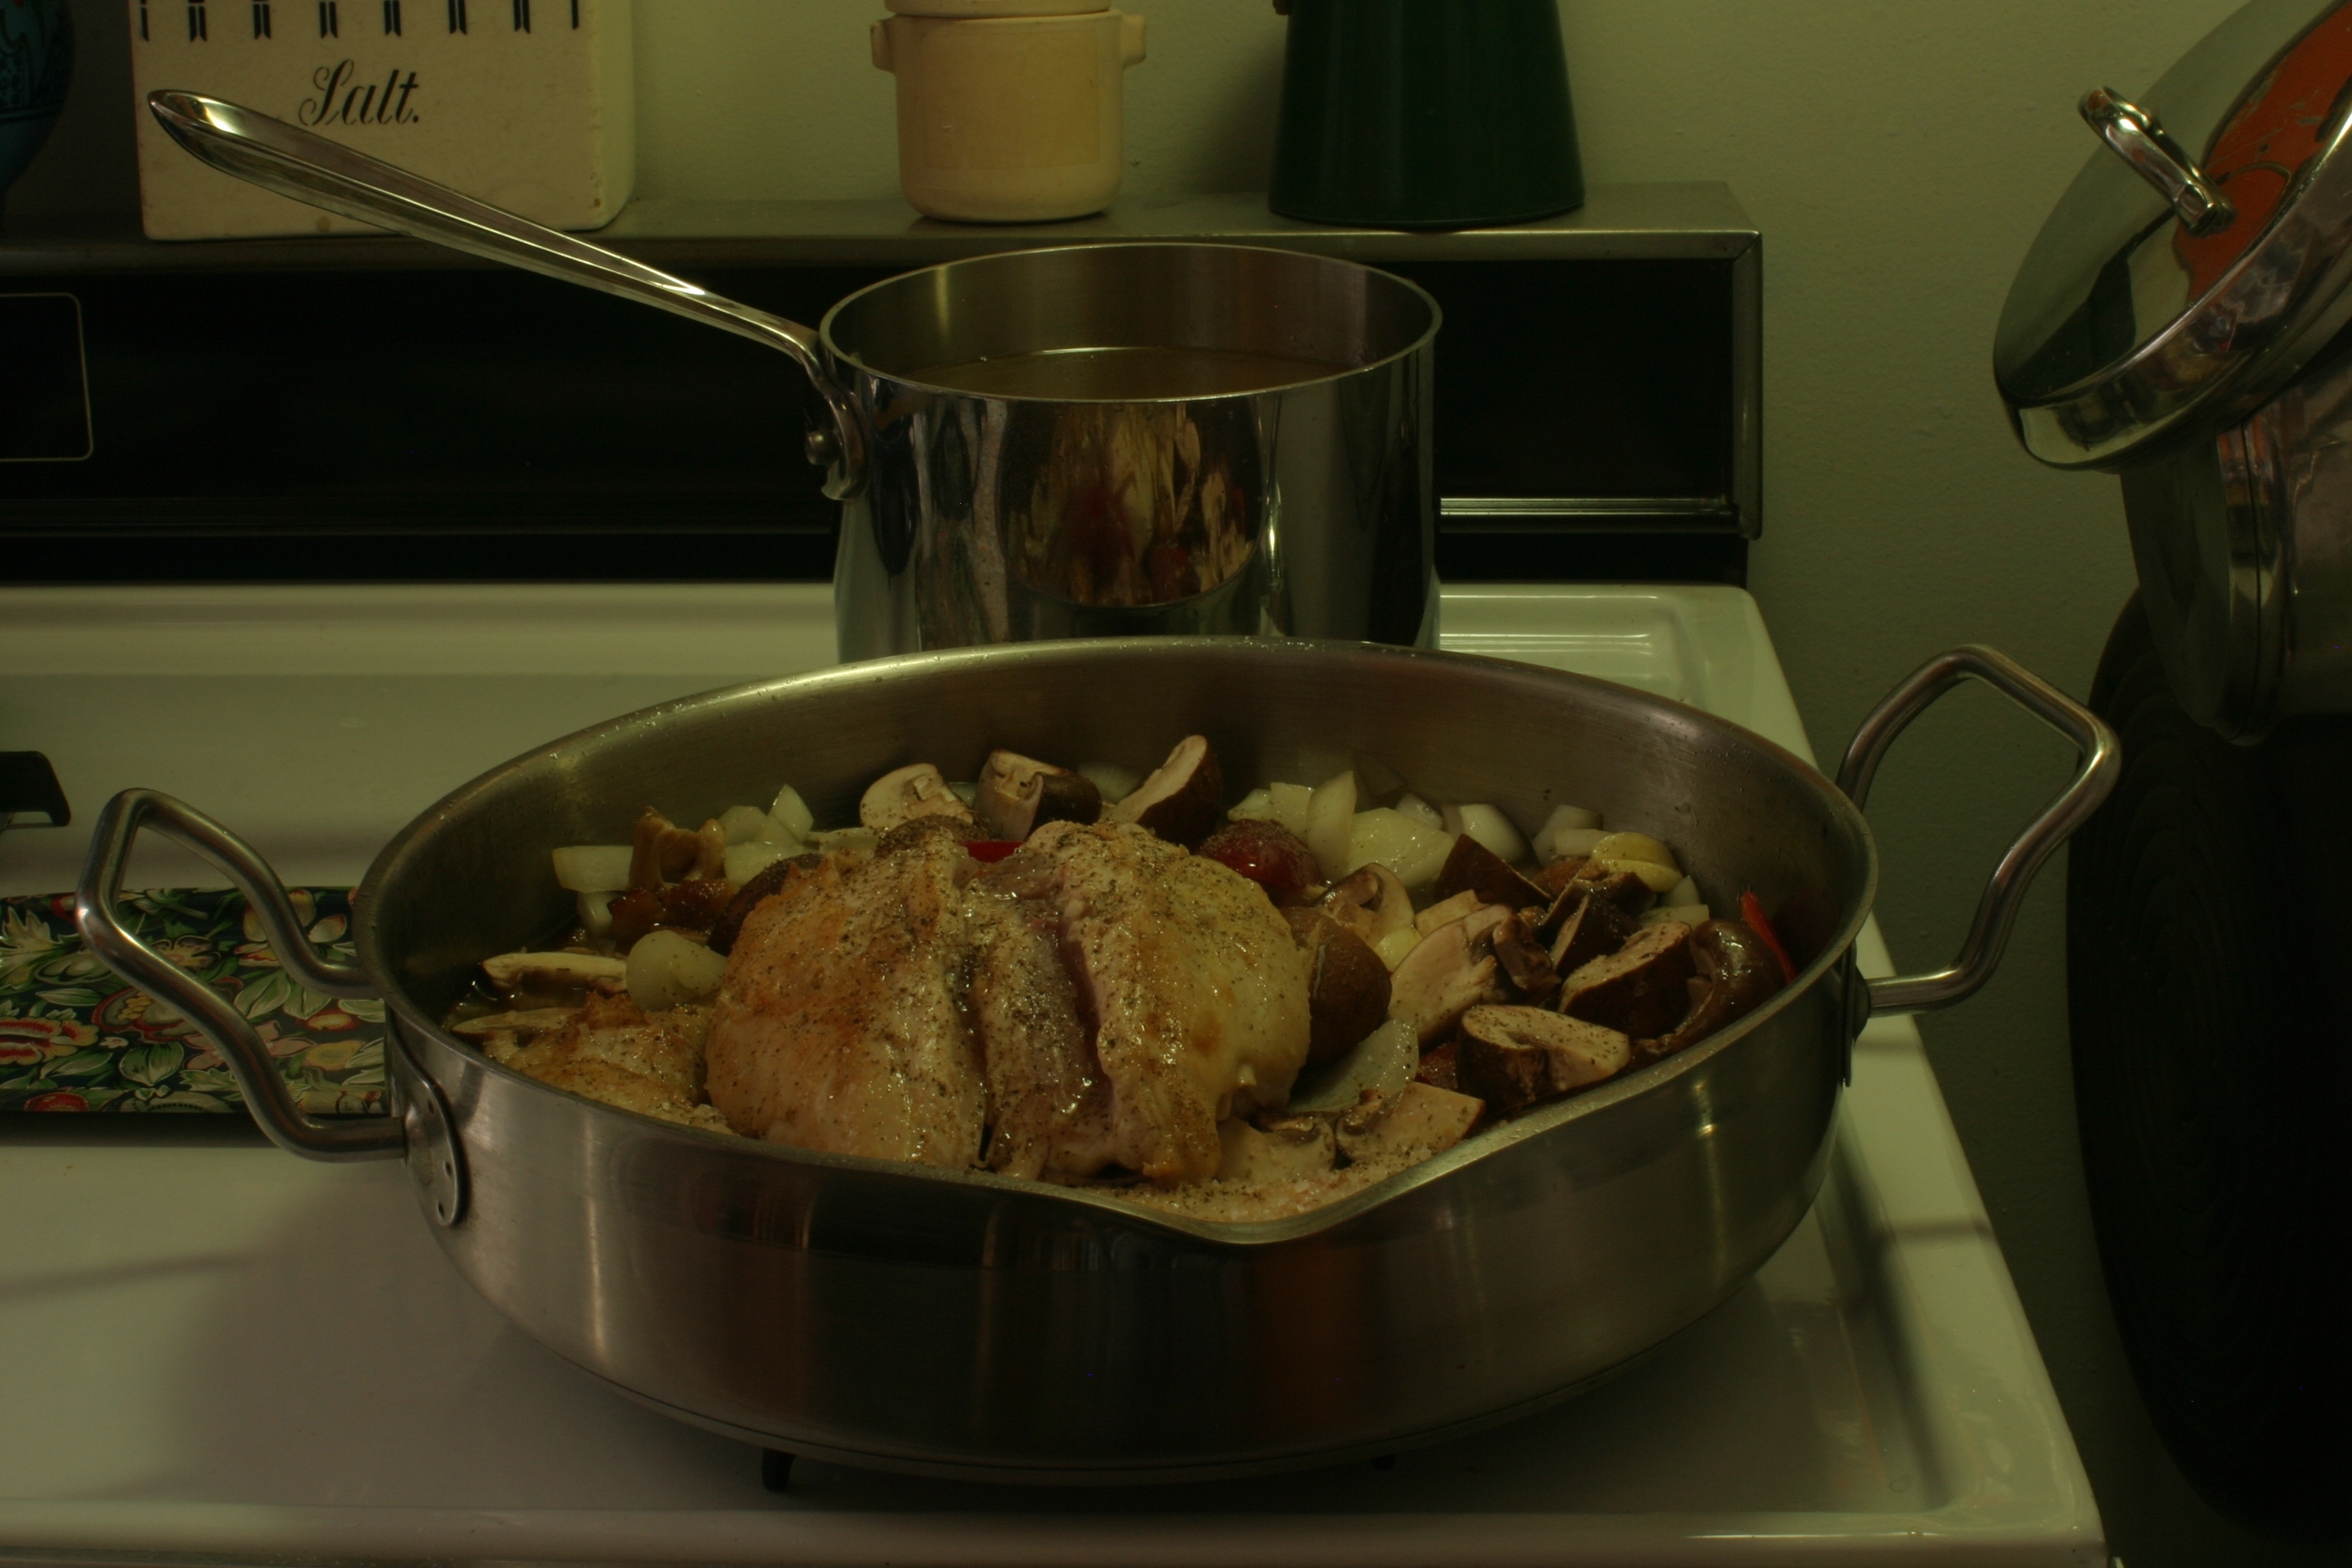
A pot of simmering chicken stock hides behind a skillet of chicken to be braised. That’s a happy sight to see, innit? Not so happy were the neighbors, who must be pretty sick of hearing our kitchen fan on for hours and hours and hours.
I braised the legs and breast of the chicken, using the “I Can Cook” recipe for braised turkey (which I followed rather loosely). The chicken wings and backbone got tossed into a 2 quart saucepan with the balance of the stock, which I then simmered for about an hour (as the rest of the chicken was slowly simmering in another pan on its way to braised delightfulness). I mention this bit of stock magic in passing, if for no other reason than to make you so hungry that you are actually consider taking the time to make some chicken stock.
Loose instructions for making chicken stock. You need two things to make chicken stock: water and some meaty chicken bones. The more meat you have, the richer the resulting stock. I use three times (in volume) the amount of water to the amount of bones. Adding aromatics to the water will help balance the stock. I’ve changed the way I make stock after a recent consultation with Dave-the-butcher (he runs Barron’s Meat and his newest venture, Barron’s Eats, out of the Marketplace in Alameda). My stocks used to be based on whatever bits and pieces of vegetables that I had reserved in the freezer as I prepared other meals, plus whatever chicken bones I had reserved from other chicken dishes (all frozen, but some cooked and some not). I’ll still keep making stock from those veggie bits, but in the future I’ll use them solely for vegetarian stock. My new way of making stock is still very simple. Place in a stock pot the contents of a bag of purchased frozen chicken bones (the weight of which always varies) and to the pot add any bones you’ve reserved from other chicken dishes. Cover the bones with three times the volume of water. Add at least one large onion (no skin), some peppercorns, and a few carrots (unpeeled) and celery ribs. I don’t salt my stock until I’m ready to use it. Bring the water to a boil, and let it boil until scum (if any) raises to the top. Skim scum and reduce heat to a simmer. Let simmer for three hours. If you have the time and space in the fridge, let the pot cool down on a counter, put the cooled-down pot in the fridge overnight, and then simmer the stock the next day for a few hours. Strain the stock – I don’t bother staining it through cheesecloth – and store the resulting yummy rich stock. As you can see, there’s very little active work in making stock, even though the process itself takes a few hours.
Well, those were typical recipes from your little munakins – more the idea of a recipe than a layered, complex approach to cooking. When I cook, I tend to focus on one ingredient or one technique (much as the Japanese do in their cooking, less like the French do when they cook). But I have to remind myself that I am able to cook this way because of the recipes that I’ve read and tested that have become part of my cooking repertoire. If I don’t try new recipes I won’t learn new things.
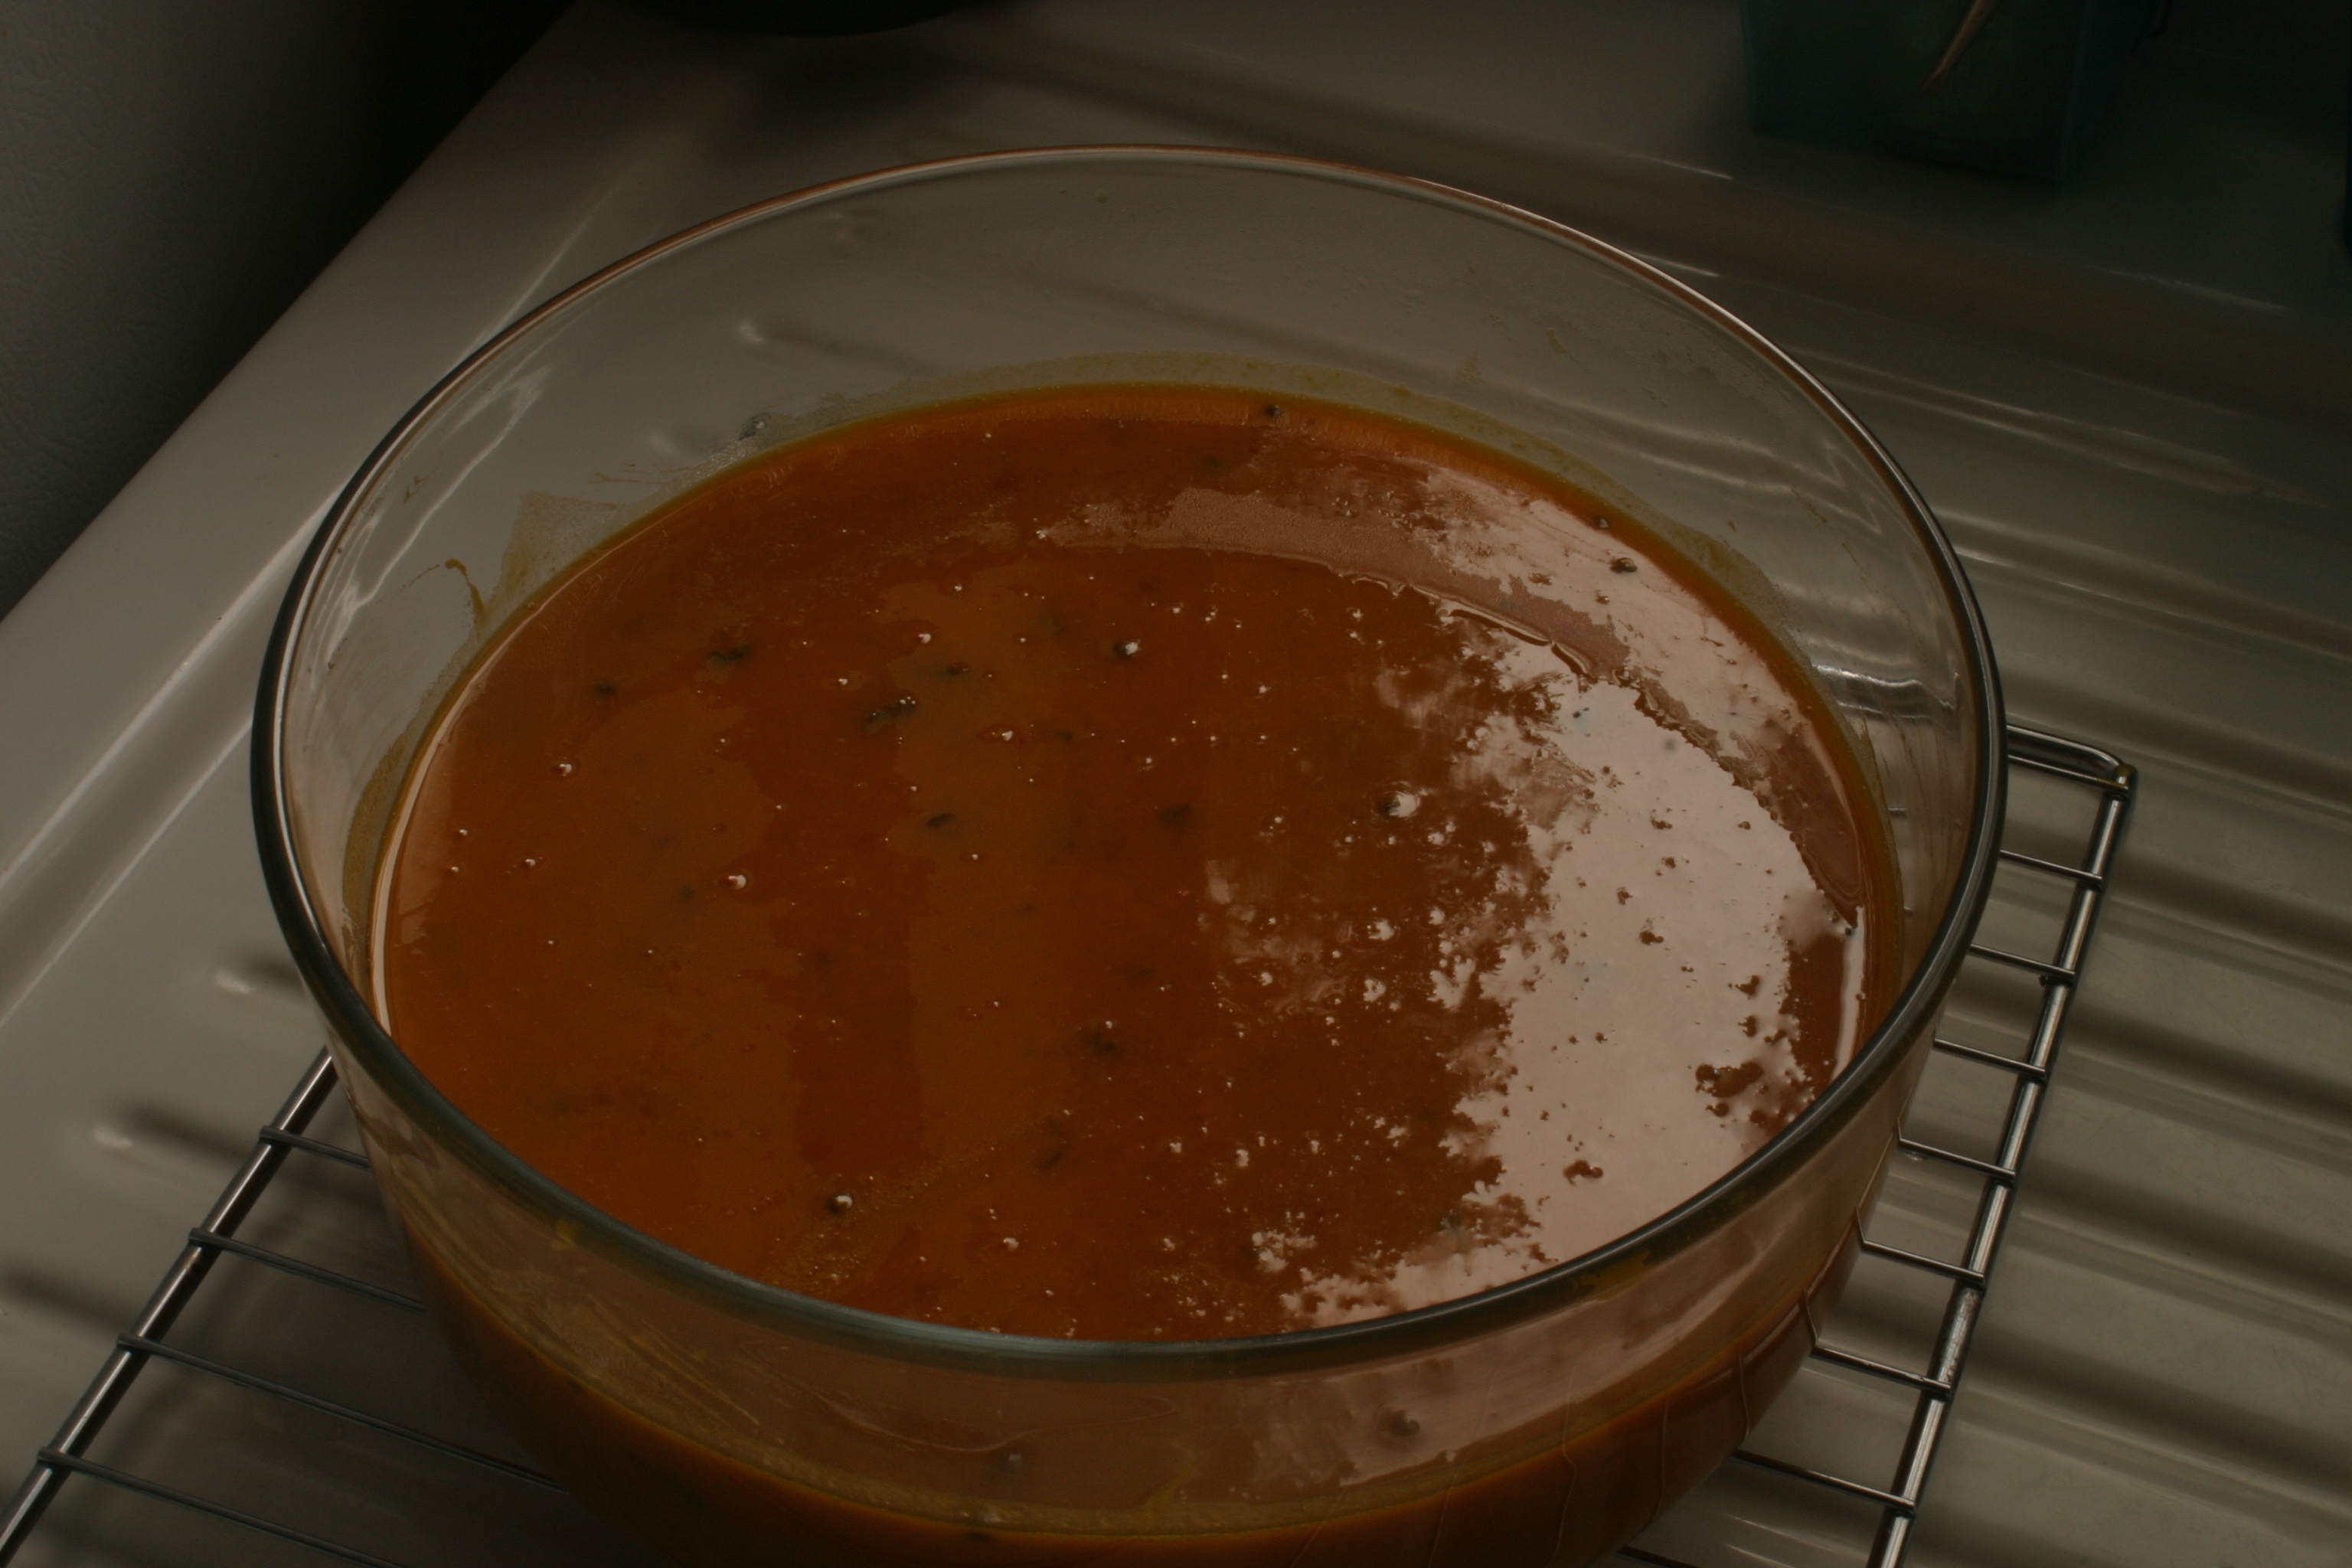
My version of Madison’s winter squash soup. It was so incredibly delicious!
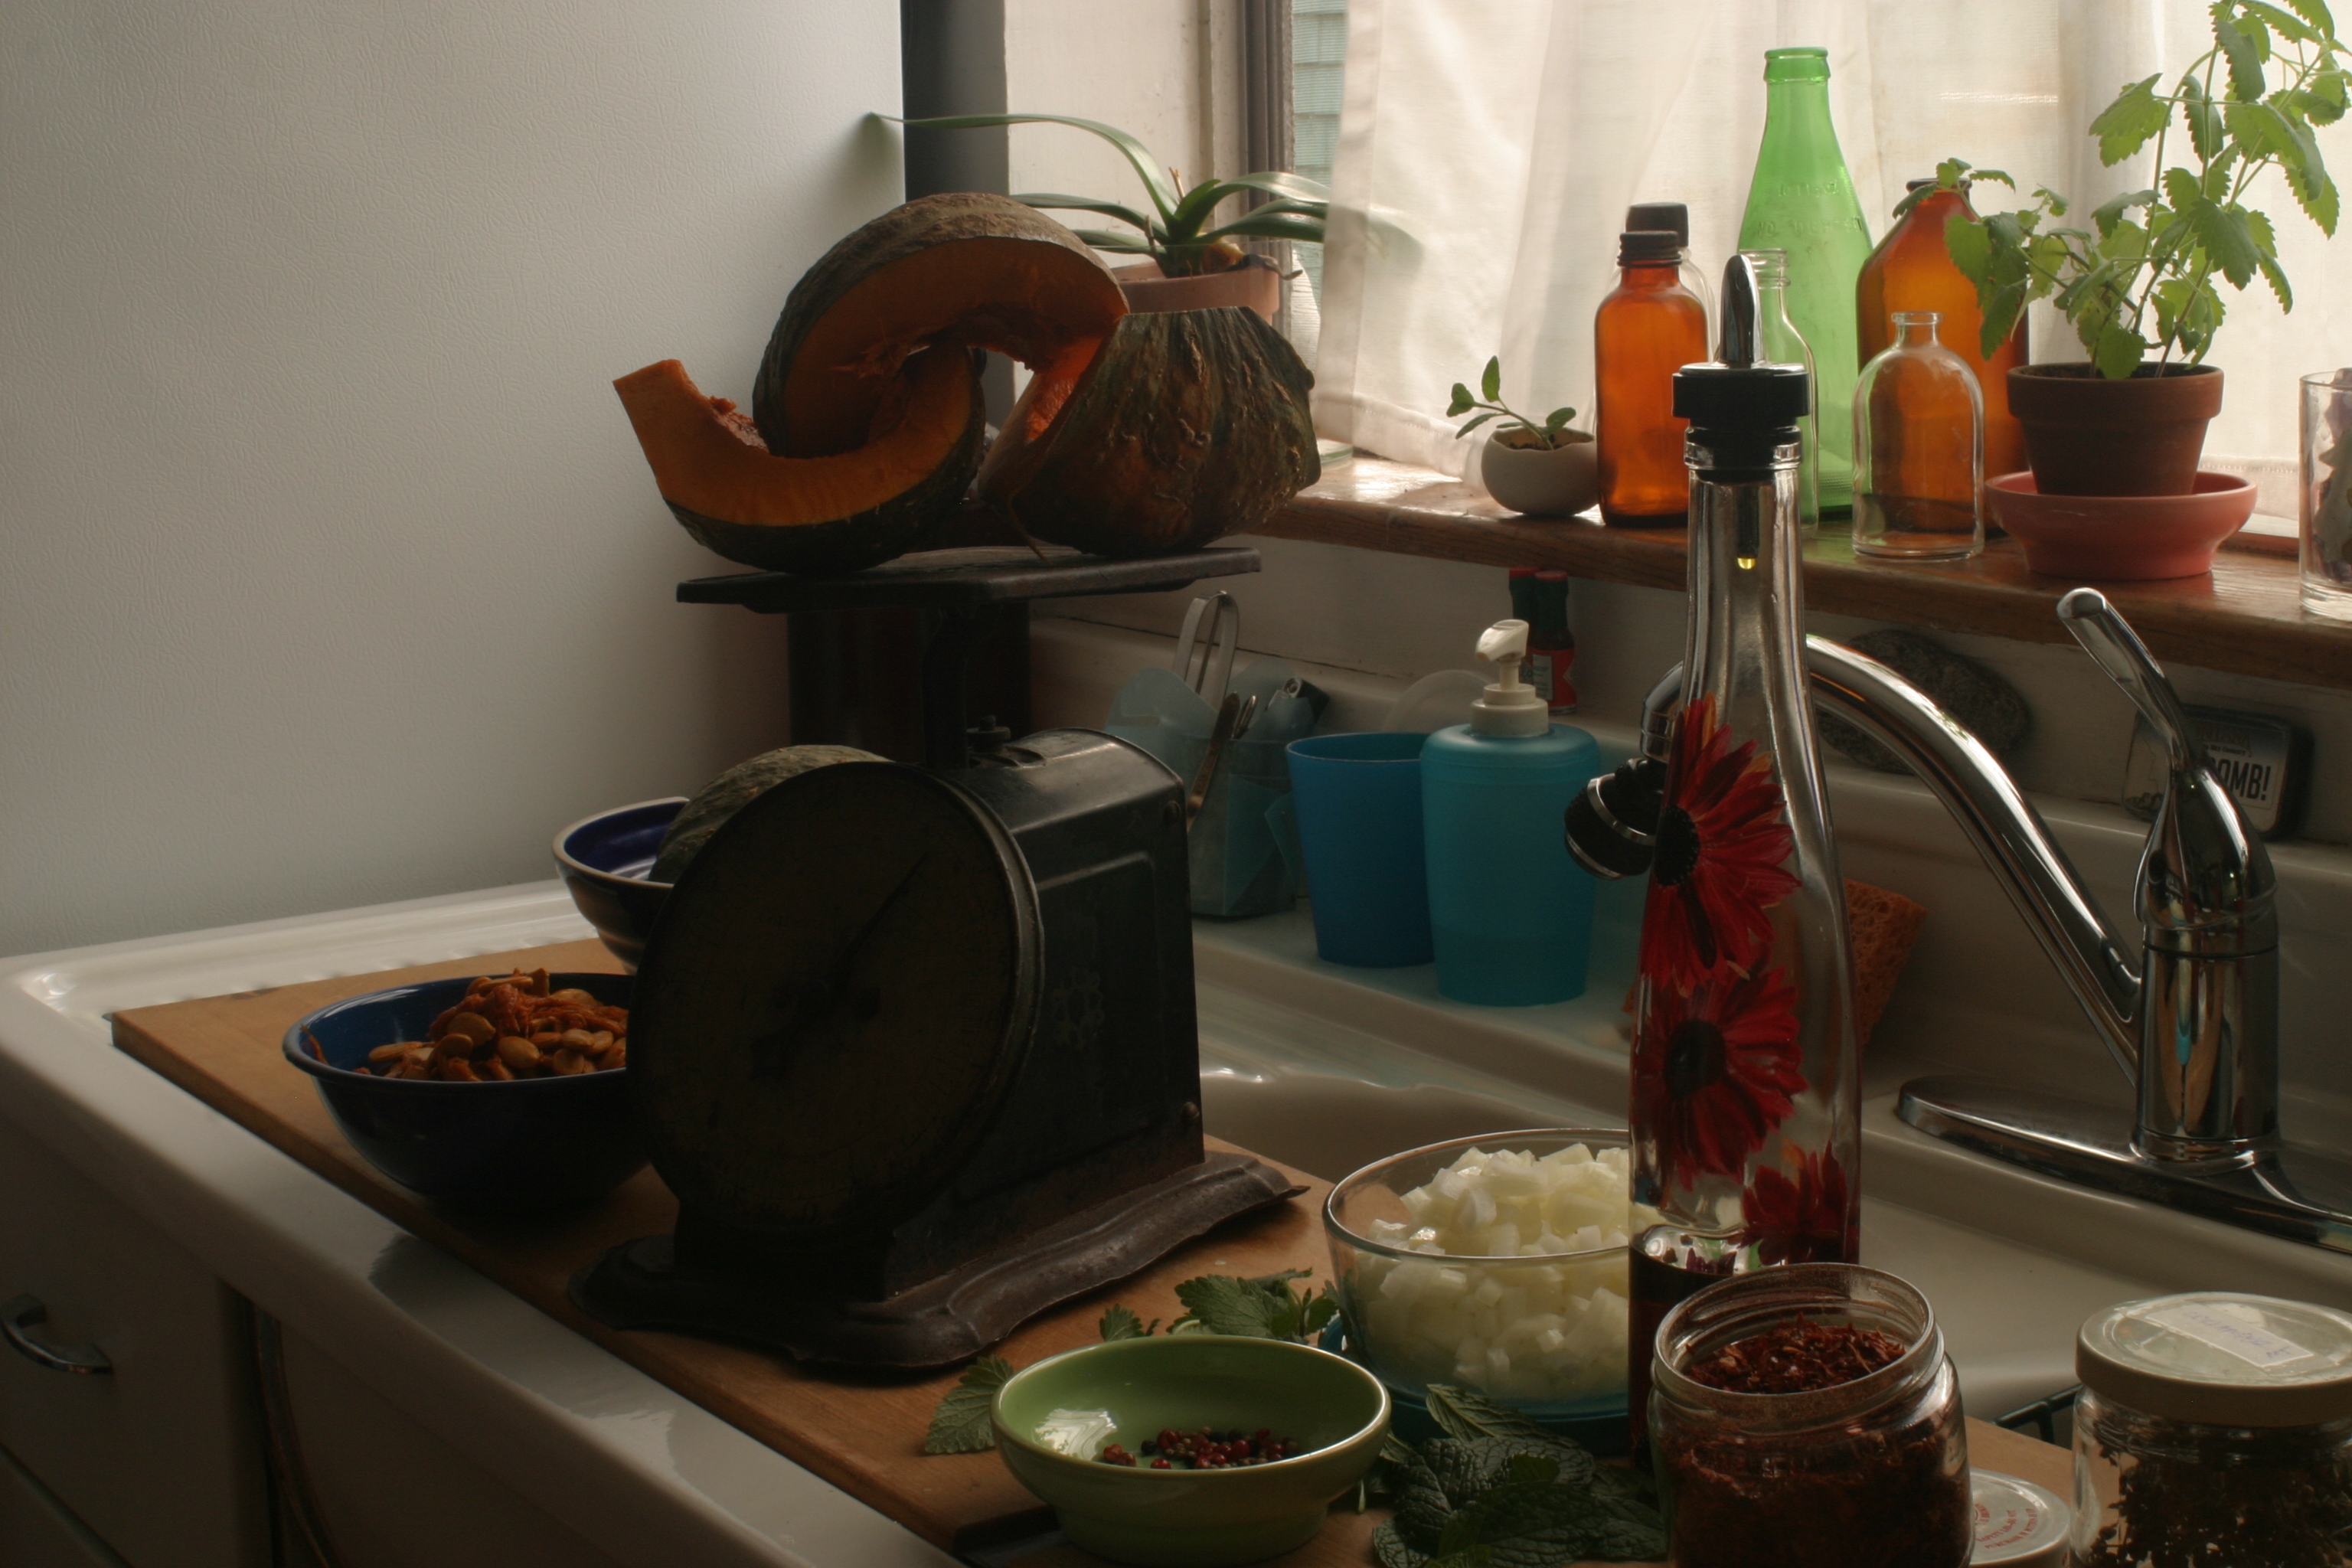
Ingredients for Deborah Madison’s winter squash soup, as provided by this month’s Sunset magazine. Having a kitchen scale is a godsend, really it is.
So, when I got this month’s Sunset magazine and saw the amazing recipes provided by noted cookbook author Deborah Madison, I knew I had to try at least one of the recipes. Therefore and so forth, I close this post with three pictures and and some instructions: purchase a copy of this month’s Sunset magazine and make at least one recipe from the article of recipes for Thanksgiving sides by Deborah Madison. You want to make her recipe for Winter Squash Soup with Red Chile and Mint, trust me on this. I did and it was DELIGHTFUL.

An assortment of spices and herbs to be used in my version of Madison’s winter squash soup.
I followed her recipe almost completely – a rarity for me – even though I thought that the spice and herb combination sounded dubious, and I had my doubts about the richness of a stock made from the trimmings of winter squash. I learned to trust the lady, though – there’s a reason her cookbooks sell so well! I’ll make this soup along with the braised turkey for Thanksgiving. If I have time to test the recipe, I’ll make Madison’s skillet cornbread, too (I’ll have to find a substitution for the buttermilk, which is moy tricky to do). I might even try her “jumble of sweet and sour onions” … Oh, I do love planning menus, don’t you???
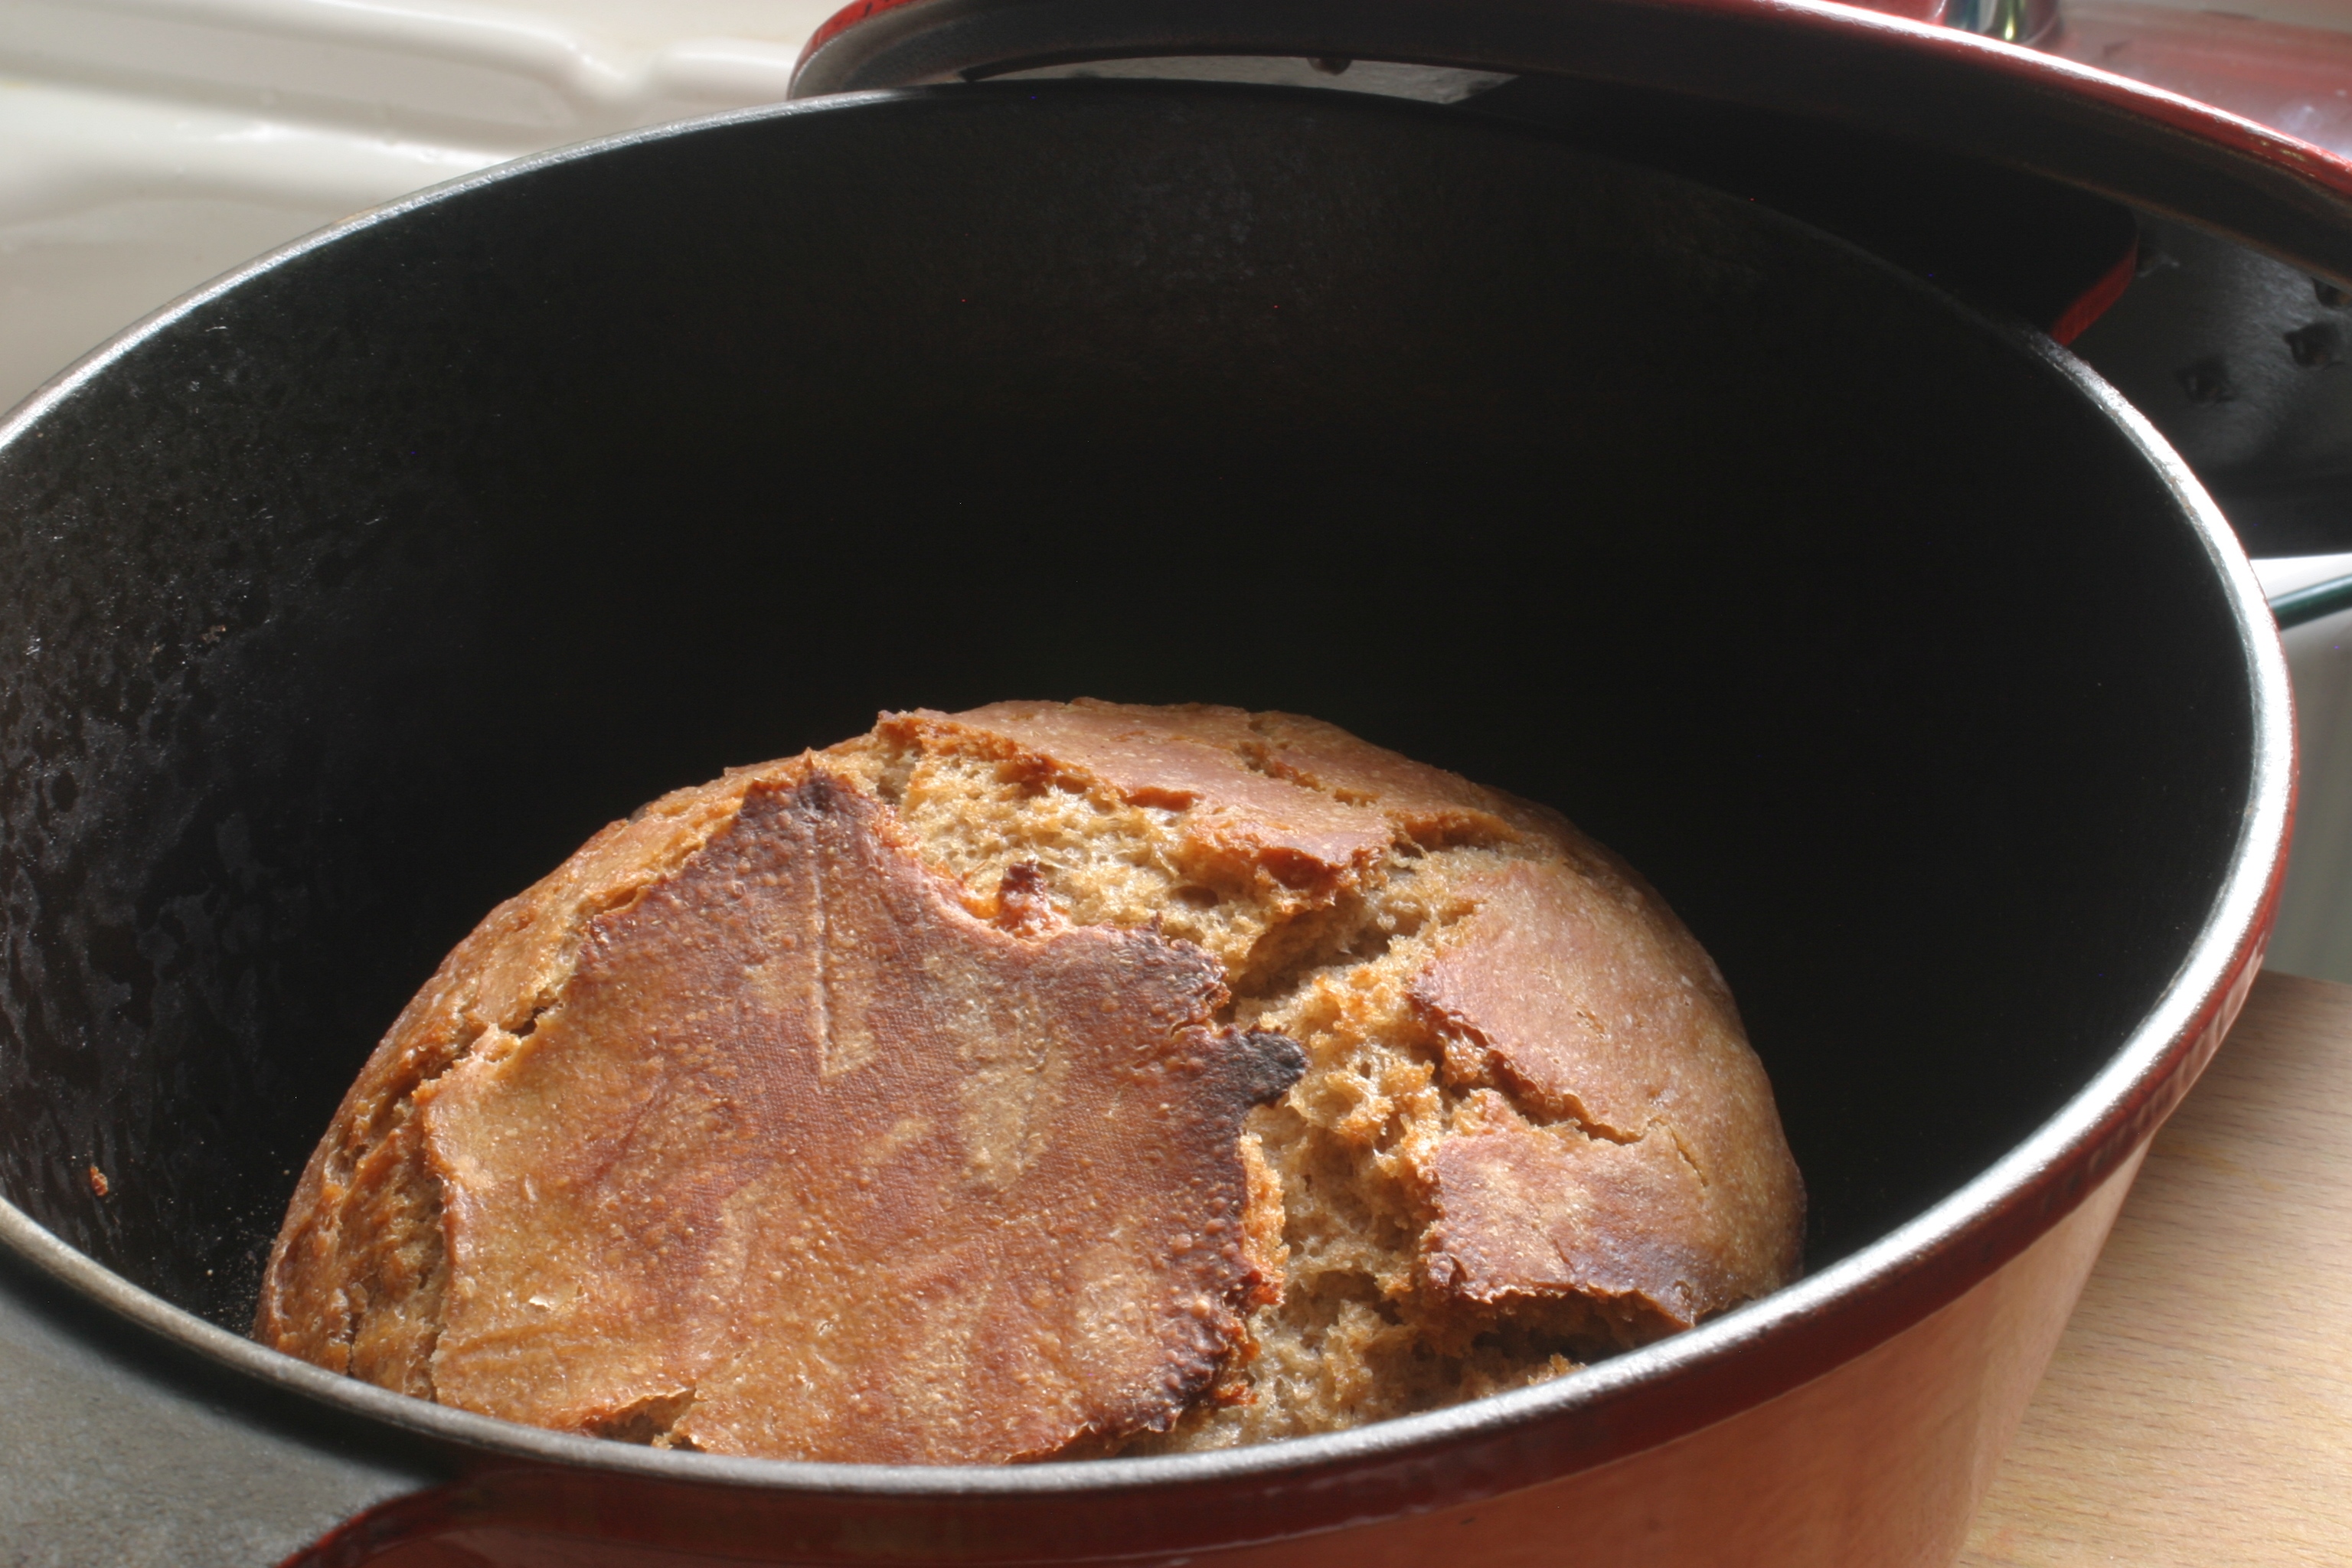
I baked bread while I wrote this post, and the smell of the finished loaves has been heady! This loaf got a little mashed when it was transferred into the pot for baking, but it tastes so so so so good. Fresh bread, you are so yummy.
Well my pets, that’s it for this week’s post. It’s been raining off and on today, so I need to rethink the outfit I was going to wear to the gym and work (I bike, you see). Next week’s post will be a short one, as I will be in full fuss mode in preparation for Thanksgiving. Until then, have a lovely week, drink some soup and stay dry!
